A closed lid leaves almost no room for a “thin” extra layer.
A sliding cover can feel reassuring, but a MacBook’s display is engineered to close against the keyboard deck with extremely tight clearance. A cover that seems flat can concentrate pressure at the camera area, risking cracked glass, panel damage, or a distorted lid. Apple specifically advises against leaving a camera cover on when closing a MacBook.
For a tangible routine, close the camera only through macOS permissions: remove access app by app, watch for the green camera indicator, and quit unfamiliar video apps. An external webcam with a built-in shutter can be unplugged when idle. For shoulder-surfing rather than camera spying, use a removable privacy filter—but take it off before closing the lid unless its maker explicitly confirms closed-lid compatibility.
- A “0.03-inch” slider is roughly 0.76 mm—far thicker than Apple’s 0.1 mm cover guidance.
- The green camera indicator is hardware-linked: macOS cannot show camera video without it.

Do not close a MacBook with a raised cover attached
The clear answer is no: a conventional stick-on webcam cover should not stay on a MacBook when its lid is closed. Even covers marketed as ultra-thin add material at the most pressure-sensitive point of an exceptionally tight lid-and-display fit.
Apple’s warning is not about a cover disabling the camera or causing software trouble. It concerns physical display damage. When the lid shuts, the cover can concentrate force against the panel rather than allowing the lid to sit evenly. Possible results include pressure marks, scratches, cracks, or damage around the camera area.
“Ultra-thin” is a marketing description, not a clearance specification. Thickness varies with the slider, adhesive, edge shape, and any trapped dust; a fraction of a millimeter can matter. A cover that seems harmless while the MacBook is open may still create damaging pressure once the lid is latched.
For physical privacy, remove the cover before closing the lid, or use a solution that adds no thickness at the display edge, such as a removable external shutter or a camera-blocking visual filter designed for open-lid use.
A webcam cover may be used only while the MacBook remains open, then removed before transport or storage. Do not rely on “ultra-thin” claims as evidence that it will clear the display safely.
Why a millimeter matters
Modern MacBooks are engineered as exceptionally thin, tightly matched pairs: the upper display assembly and lower case meet with almost no spare space once the lid is shut. The clearance is designed for the factory components, not for an object adhered near the camera.
A raised cover does not distribute its thickness across the lid. Instead, it acts like a small hard stop at one point. As the lid closes, hinge force and the natural flex of the enclosure can press that point into the display surface opposite it. Even a protrusion measured in fractions of a millimeter can matter when the intended gap is similarly small.
What sits beneath the screen surface
The visible panel is a layered assembly, not a single robust sheet. Depending on the model, it includes cover glass, optical films and polarizers, an LCD layer, and—in Liquid Retina XDR models—a sophisticated backlight system. Localized compression can disturb or damage those layers before any obvious crack appears.
Possible results include:
- bright or dark pressure spots
- persistent lines, discoloration, or uneven backlighting
- hairline cracks in the cover glass or panel
- damage that becomes visible only after the cover is removed
A cover may feel smooth to a finger yet still be too tall for a closed MacBook. Its size is less important than its installed thickness, hardness, and exact location opposite the panel.
What the pressure can do
A raised cover does not always cause an immediate, dramatic crack. Early signs can be deceptively minor: a scuff on the display coating, a shiny rubbed patch, or a faint rectangular imprint where the cover meets the panel. Those marks may be cosmetic, but they show that the lid is closing against something it was not designed to accommodate.
Damage can progress with use
Each close applies pressure at the same small point. Carrying the MacBook adds flex; a tightly packed bag, books, or a hand pressing on the lid can multiply that load. Over time, the possible results become more serious:
- Pressure lines or bright spots in the LCD, often most visible on light backgrounds
- Dead or stuck pixels near the contact area
- Cracks in the glass or display layers, sometimes appearing without a single obvious impact
- Bezel distortion, separation, or lid misalignment around the camera area
- Backlight or panel failure that requires replacement of the complete display assembly
The important distinction is that a surface scratch may be tolerable; internal panel damage is not. Modern MacBook displays are thin, laminated assemblies, so repair commonly means replacing the entire lid/display unit rather than a single inexpensive layer. A cover that seems harmless on a desk can therefore become costly after repeated closing and compression during travel.
Why “0.1 mm” is not a safety guarantee
Apple’s reference to a cover no thicker than a sheet of printing paper—about 0.1 mm—is best read as a risk limit, not a certification that every product carrying an “ultra-thin” label can stay on during closure. It addresses the cover’s nominal thickness, not the complete stack or its real-world fit.
A cover can exceed that practical limit through details that product listings often omit:
- Adhesive pads add thickness and can compress unevenly.
- Sliding rails, tabs, and edge lips may be substantially taller than the stated central panel.
- Dust or grit trapped behind the cover creates a hard, concentrated point of contact.
- Manufacturing tolerances in both the accessory and the lid mean a nominal measurement is not a guaranteed installed measurement.
Even a flat-looking cover can shift slightly, curl at an edge, or leave residue that changes how it sits. A product marketed as 0.1 mm may therefore be less forgiving than its headline specification suggests.
The cautious approach is simple: remove any physical webcam cover before closing the MacBook lid. That eliminates the pressure point rather than relying on a measurement that is difficult to verify once adhesive, wear, and debris enter the picture.
If a cover is kept for desk use, its highest point—including adhesive and slider rails—matters more than the advertised film thickness. Removing it before travel or storage remains the lowest-risk choice.
A physical cover needs more than a thin label
-
Measure the installed stack, not the advertised film
The relevant height includes the base, adhesive layer, slider, rails, and any edge that can sit proud of the bezel. A stated cover thickness rarely accounts for this complete stack.
PreferA maker that states installed thickness and explicitly confirms the exact MacBook generation.Reject“Ultra-thin” claims with no closed-lid clearance or model-specific evidence. -
Inspect the slider’s hard contact points
A slider can be thin at its center yet have raised tracks, sharp edges, or a stiff stop. These concentrated parts are more likely to transfer force into the display when the lid is shut.
PreferA smooth, low-profile mechanism with no proud rails or hard corners near the panel.RejectGeneric sliding shutters designed around the deeper bezels of typical Windows laptops. -
Treat adhesive as part of the fit
Foam tape, uneven adhesive, trapped dust, or a slightly crooked installation can add height and create a pressure point. Heat and repeated slider use can also weaken the bond.
PreferThin, even adhesive and a clean, flat mounting surface.RejectThick foam pads, repositioning repeatedly, or forcing a misaligned cover into place. -
Plan removal before applying it
Adhesive can leave residue or pull at coatings if removed abruptly, especially after long exposure to warmth. Gentle heat and a non-metal tool reduce the chance of cosmetic damage.
PreferRemoval guidance that uses low heat and slow lifting without solvents near the display.RejectPrying with metal, aggressive solvents, or assuming a removable cover leaves no trace.
Privacy filters solve a different problem
A webcam cover blocks the camera lens. A screen protector guards the display surface from scratches. A privacy filter narrows the viewing angle so nearby people see a darkened screen—not a covered camera. None is a substitute for the others.
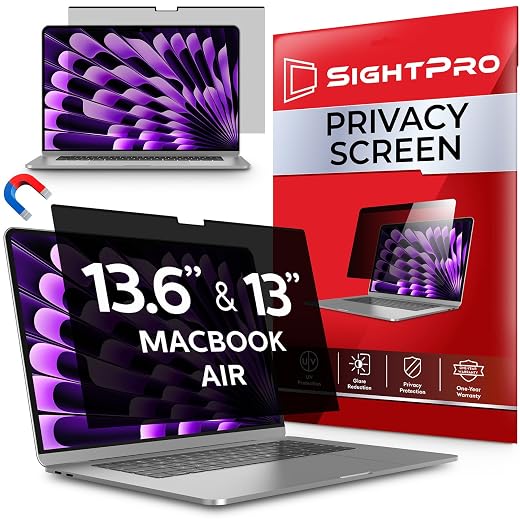
For shoulder-surfing protection, start with guidance on choosing a laptop privacy screen. A filter must match the exact MacBook generation, including the display size and notch layout. Adhesive films add material permanently; removable magnetic filters are convenient, but their edge thickness and any tabs still matter when closing the lid.
A privacy filter also leaves the webcam usable for calls. It should not be placed over, taped across, or allowed to obscure the camera area. When a camera must be disabled, macOS camera permissions or physically disconnecting external cameras avoid adding a rigid object at the MacBook’s most pressure-sensitive edge.
Before closing, remove any filter whose maker does not explicitly confirm closed-lid compatibility for that exact model.
Camera privacy without adding anything to the lid
How does macOS control camera access?
Apps must be granted camera access through macOS. In System Settings > Privacy & Security > Camera, access can be reviewed and revoked per app; an app with its switch off cannot use the camera until permission is granted again.
What needs checking in a browser?
A browser needs macOS camera permission, but individual websites also receive their own permission decisions. Removing a site’s camera allowance in Safari, Chrome, or another browser prevents that site from reopening the camera without a new request.
Does quitting unused apps help?
Yes. Quitting video-call, recording, and browser apps removes an active process that could be holding camera access. It is a sensible habit after a meeting, especially when a browser has several open tabs or extensions.
What does the green camera light mean?
On MacBooks, the built-in camera is engineered so that it cannot activate without the green camera indicator illuminating. The light therefore provides a hardware-linked signal that the camera is operating, while permissions determine which apps are allowed to trigger it in the first place.
For those who need a visible barrier
Some workplaces, travel situations, and personal threat models call for a barrier that is obvious at a glance—not merely a software setting. That preference is reasonable, but the safest rule for a MacBook’s built-in camera is uncompromising: never close or carry the computer with any cover attached to the lid.
If a removable cover is used only while the MacBook is open, it should be checked each time:
- Use a model-specific piece with no loose rail, sharp edge, or residue.
- Clean the camera bezel and cover first; grit can scratch the finish or raise the contact point.
- Confirm it does not overlap the camera, ambient-light sensor, or display surface.
- Remove it before closing the lid, placing the MacBook in a sleeve, or transporting it.
A lower-risk hardware option
A disconnectable external webcam provides a true physical break without putting anything on the display. With the built-in camera disabled in device-management settings where available, or simply left unused, the external camera can be unplugged and stored when privacy is required. This is especially practical for desk-based high-security work.
Tape is a poor substitute. It can leave adhesive residue, collect dust, shift over sensors, and tempt users to close the lid with material still in place. Opaque tape may block the image, but it does not solve the lid-clearance problem.
A safer MacBook closing routine
-
Limit camera access
Allow only trusted apps and sites; revoke permissions no longer needed.
-
Check the green indicator
It is hardware-wired: if the camera is active, the light should be on.
-
Remove raised accessories
Take off every slider or hard cover before lowering the lid.
-
Pack a bare, closed MacBook
Use a sleeve only after confirming nothing is pressing against the display.
Camera privacy is strongest when it combines restrained permissions, a correctly understood status light, and careful handling. Never travel with a typical raised webcam slider attached to a closed MacBook.